As a brand-new technology, G7 has been a hot topic in the printing industry in recent years. More and more printing companies have begun to pay attention to and actively apply G7 technology for printing quality correction. This article explains the application of Curve2 software in the G7 correction process based on the core concept of G7 and the G7 correction process. The main implementation steps of a typical G7 calibration workflow are introduced, and important parameters that need to be controlled in this process are analyzed, such as gray balance, NPDC curve, HR, TVI curve, etc.
1. G7 calibration process
The process flow of G7 correction mainly includes four steps: pre-press CTP linearization, flat screen test, basic test and verification test.
1. CTP linearization
Stable plate-making conditions are the prerequisites to ensure the smooth implementation of the G7 process. Therefore, the CTP working stability must be checked before the G7 calibration is implemented, mainly to check whether the exposure conditions and the processing conditions are stable. The exposure condition test can be entrusted to the CTP engineer to complete; the processing condition stability can be judged by regularly monitoring the temperature, PH value, conductivity and dot output of the developer. On the basis of completing the above work, the CTP linearization work is completed to ensure the linear output of the outlets.
2. Flat screen test
The main purpose of the flat screen test is to determine whether the printing press is in a good working condition, which is crucial for G7 calibration. Through the flat screen test, we can judge the pressure uniformity and water-ink balance status of the rubber, water roller, ink roller, etc. of each unit of the printing press. We can correct the printing press to the appropriate working state according to the result of the flat screen test.
3. Basic testing
The basic test is also called the calibration test. The test standard is shown in Figure 1. It is printed using the test version output under the condition that only the CTP linearization compensation curve is loaded. The test goal is to obtain the printing machine defined in ISO12647-2 CMYK and RGB have a total of 7 color chromaticity requirements when printing gray balance data and compensation.
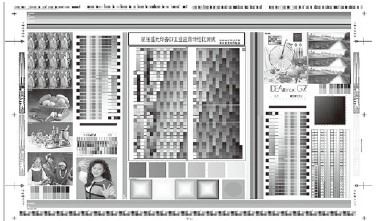
Figure 1 Basic / Verified Beta
4. Verification test
After completing the basic test, measure the P2P25 standard version (as shown in Figure 2), and import the measurement data into Curve2 software to generate gray balance compensation data, and then load the compensation data into the prepress process and publish it for verification testing. Through the verification test, you can verify whether the gray balance compensation curve meets the standard and whether the print quality meets the technical requirements.
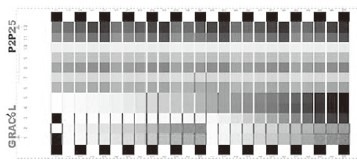
Figure 2 P2P standard version
Dog Toys Tpr,Dog Squeaky Tpr Toy,Dog Toy Treat Tpr,Interactive Tpr Dog Toy
Dongguan King Pet Toys Co.,Ltd , https://www.kingpettoys.com